Wednesday, December 15, 2010
How To: Fix “Windows Sidebar Is Managed By Your System Administrator” Error in Windows Vista Author: admin

Wednesday, December 15, 2010 1
This article helps you in troubleshooting the Sidebar runtime error.
When you try to use a Windows Vista Sidebar gadget, you get the following error message:
"A Runtime Error has occurred. Do you wish to Debug? Line: <line number> Error: Unspecified error"
Cause for this:
This occurs when the gadget's code tries to set a gadget event to null. The events cannot be set to null.
Workaround:
You need to get into the gadget's .html file and assign a function to the Sidebar gadget event manually.
Type this code inside a <script> tag:
System.Gadget.ondock = myFunc;
System.Gadget.ondock = null;
This should take care of the problem.
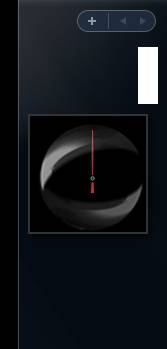
Have you come across the problem where some of the Gadgets that you added to the Sidebar/Desktop are not displayed correctly? For example, the clock gadget may be displayed as a black square containing only the "seconds" hand. Other gadgets may show up as white rectangles with an information (i) icon and a plus sign. The settings button next to the gadget does not work, but the x to close does.
Friday, December 10, 2010
Follow these easy steps to restore the damaged/corrupted or missing hal.dll file from the Windows XP CD using the Recovery Console.
- Enter Windows XP Recovery Console.
- When you reach the command line prompt (detailed in Step 6 in the link above), type the following and then press Enter:
expand d:\i386\hal.dl_ c:\windows\system32
Using the expand command as shown above, d represents the drive letter assigned to the optical drive that your Windows XP CD is currently in. While this is most often d, your system could assign a different letter. Also, c:\windows represents the drive and folder that Windows XP is currently installed on. Again, this is most often the case but your system could be different.
- If you're prompted to overwrite the file, press Y.
- Take out the Windows XP CD, type exit and then press Enter to restart your PC.
Assuming that a missing or corrupt hal.dll file was your only issue, Windows XP should now start normally.
Friday, December 10, 2010 0
Follow these easy steps to restore the damaged/corrupted or missing NTLDR and Ntdetect.com files from the Windows XP CD using the Recovery Console.
- Enter Windows XP Recovery Console.
- When you reach the command prompt (detailed in Step 6 in the link above), type the following two commands, pressing Enter after each one:
copy d:\i386\ntldr c:\
In the command listed above, d represents the drive letter assigned to the optical drive that your Windows XP CD is currently in. While this is most often d, your system could assign a different letter. Also, c:\ represents the root folder of the partition that Windows XP is currently installed on. Again, this is most often the case but your system could be different.copy d:\i386\ntdetect.com c:\ - If you're prompted to overwrite either of the two files, press Y.
- Take out the Windows XP CD, type exit and then press Enter to restart your PC.
Assuming that missing or corrupt versions of the NTLDR and/or Ntdetect.com files were your only issues, Windows XP should now start normally.
Follow these easy steps to repair the damaged/corrupted boot.ini file or replace it if it has been deleted.
- Enter Windows XP Recovery Console. The Recovery Console is an advanced diagnostic mode of Windows XP with special tools that will allow you to restore the boot.ini file.
- When you reach the command line (detailed in Step 6 in the link above), type the following command and then press Enter.
bootcfg /rebuild - The bootcfg utility will scan your hard drives for any Windows XP installations and then display the results. Follow the remaining steps to add your Windows XP installation to the boot.ini file.
- The first prompt asks Add installation to boot list? (Yes/No/All).
Type Y in response to this question and press Enter. - The next prompt asks you to Enter Load Identifier:.
This is the name of the operating system. For example, type Windows XP Professional or Windows XP Home Edition and press Enter. - The final prompt asks you to Enter OS Load options:.
Type /Fastdetect here and press Enter. - Take out the Windows XP CD, type exit and then press Enter to restart your PC.
Assuming that a missing or corrupt boot.ini file was your only issue, Windows XP should now start normally.
Follow these easy steps to repair a damaged master boot record in Windows XP.
- Enter Windows XP Recovery Console.
- When you reach the command prompt (detailed in Step 6 in the link above), type the following and then press Enter.
fixmbr - The fixmbr utility will write a master boot record to the hard drive that you're currently using to boot into Windows XP. This will repair any corruption or damage that the master boot record may have.
- Take out the Windows XP CD, type exit and then press Enter to restart your PC.
Assuming that a corrupt master boot record was your only issue, Windows XP should now start normally.
Ok, after countless hours searching and sleuthing for this issue, I could not find a resolution...until now. This is my first post ever on a technical forum, so be gentle to me. I will probably never reference this form, so you if this helped you, please let me know by sending me comments to my email at:
Technical Symptoms:
Blue Screen (BSOD)
Session 3 Initialization Failed (Session3_Initialization_Failed)
STOP 0x0000006F (0xc0000034)
This BSOD would load for both normal and safe mode.
The operating system in question was Windows XP Home SP2.
Reason: The issue occurred after I ran a virus scan using a PE boot disk that deleted the C:\windows\system32\smss.exe system file.
Resolution: By using the "dir smss*.* /s" at a DOS prompt from the PE boot disk, I was able to search the whole computer for any available files and it found a clean version in a directory. So to fix the issue I copied C:\windows\$ServicepackUninstall$\smss.exe to C:\windows\system32\ using a PE boot disk.
Acknowledgements: http://support.microsoft.com/kb/153742 , this link gave me a hint that it may be smss.exe (even though it references win2000). Upon looking at the antivirus logs, sure enough the smss.exe was found to be infected and deleted it as it could not disinfect it. I'm assuming if I did not have a virus free smss.exe file on the C: drive in another folder, I may have to pull it from a CD or find it online.
Source : www.techsupportforum.com
.